Prerequisites
- Node.js 24.5+ — Download
- Yarn 4 — bundled with Node via Corepack. Enable it:
corepack enable - Docker — Download. Needed to run a local Twenty server. Skip if you already have Twenty running elsewhere.
Phase 1 — Scaffold your project
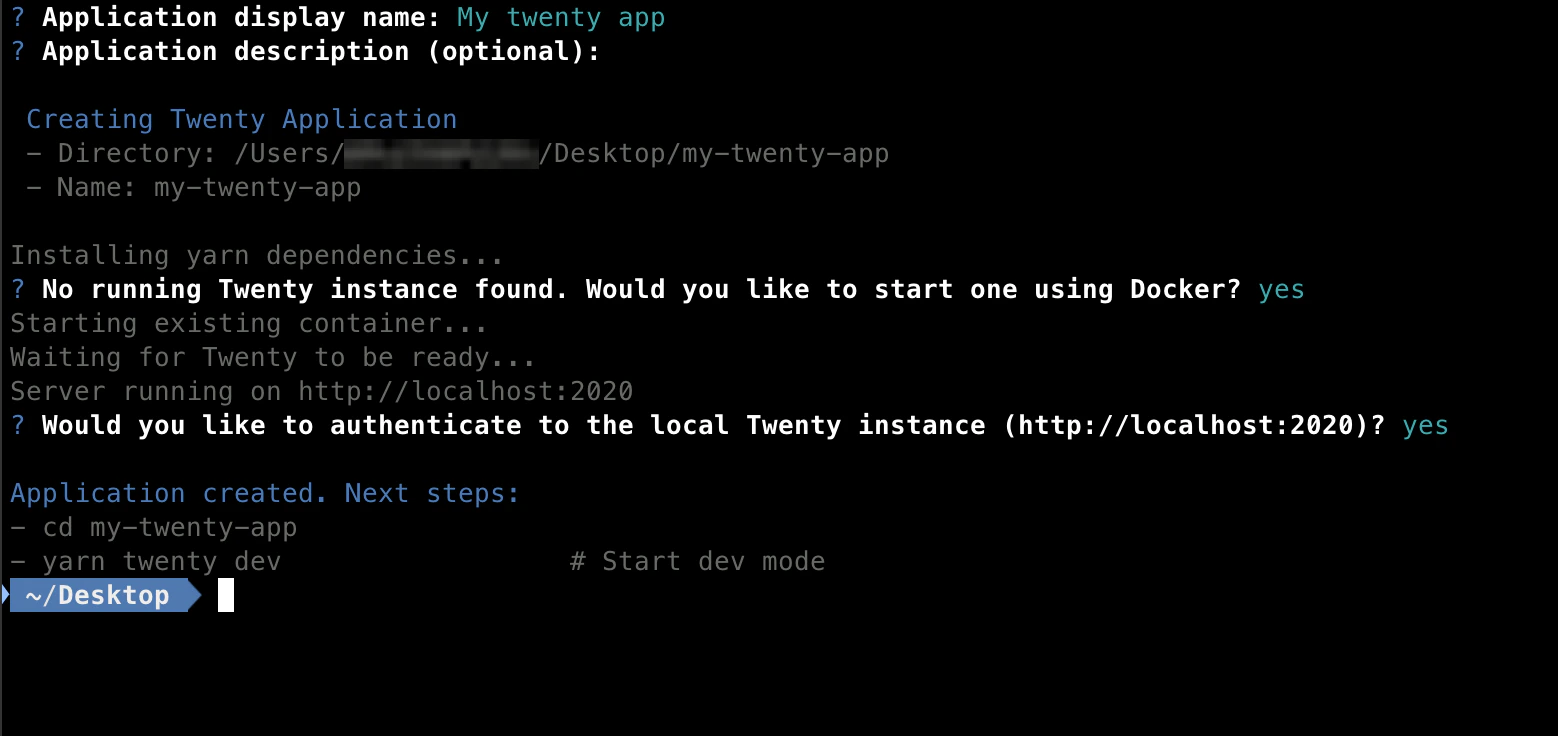
Create a new app from the template:--display-name and --description to customize the generated metadata (you can also edit it later in src/constants/universal-identifiers.ts). This generates a TypeScript project in my-twenty-app/ with a starter application-config.ts, a default role, CI/CD workflows, and an integration test.
After this phase: you have an app’s source code on your machine. It isn’t running yet — that’s Phase 2.
Phase 2 — Run a local Twenty server
Your app needs a Twenty server to sync into. The server is a full Twenty instance — UI, GraphQL API, PostgreSQL — running locally in Docker. Your local code uploads its definitions to that server, which makes them appear in the UI. The scaffolder starts one for you: with Docker running, it pulls thetwentycrm/twenty-app-dev image, starts it on port 2020, and authenticates the CLI against the pre-seeded demo workspace (tim@apple.dev) — no sign-in required.
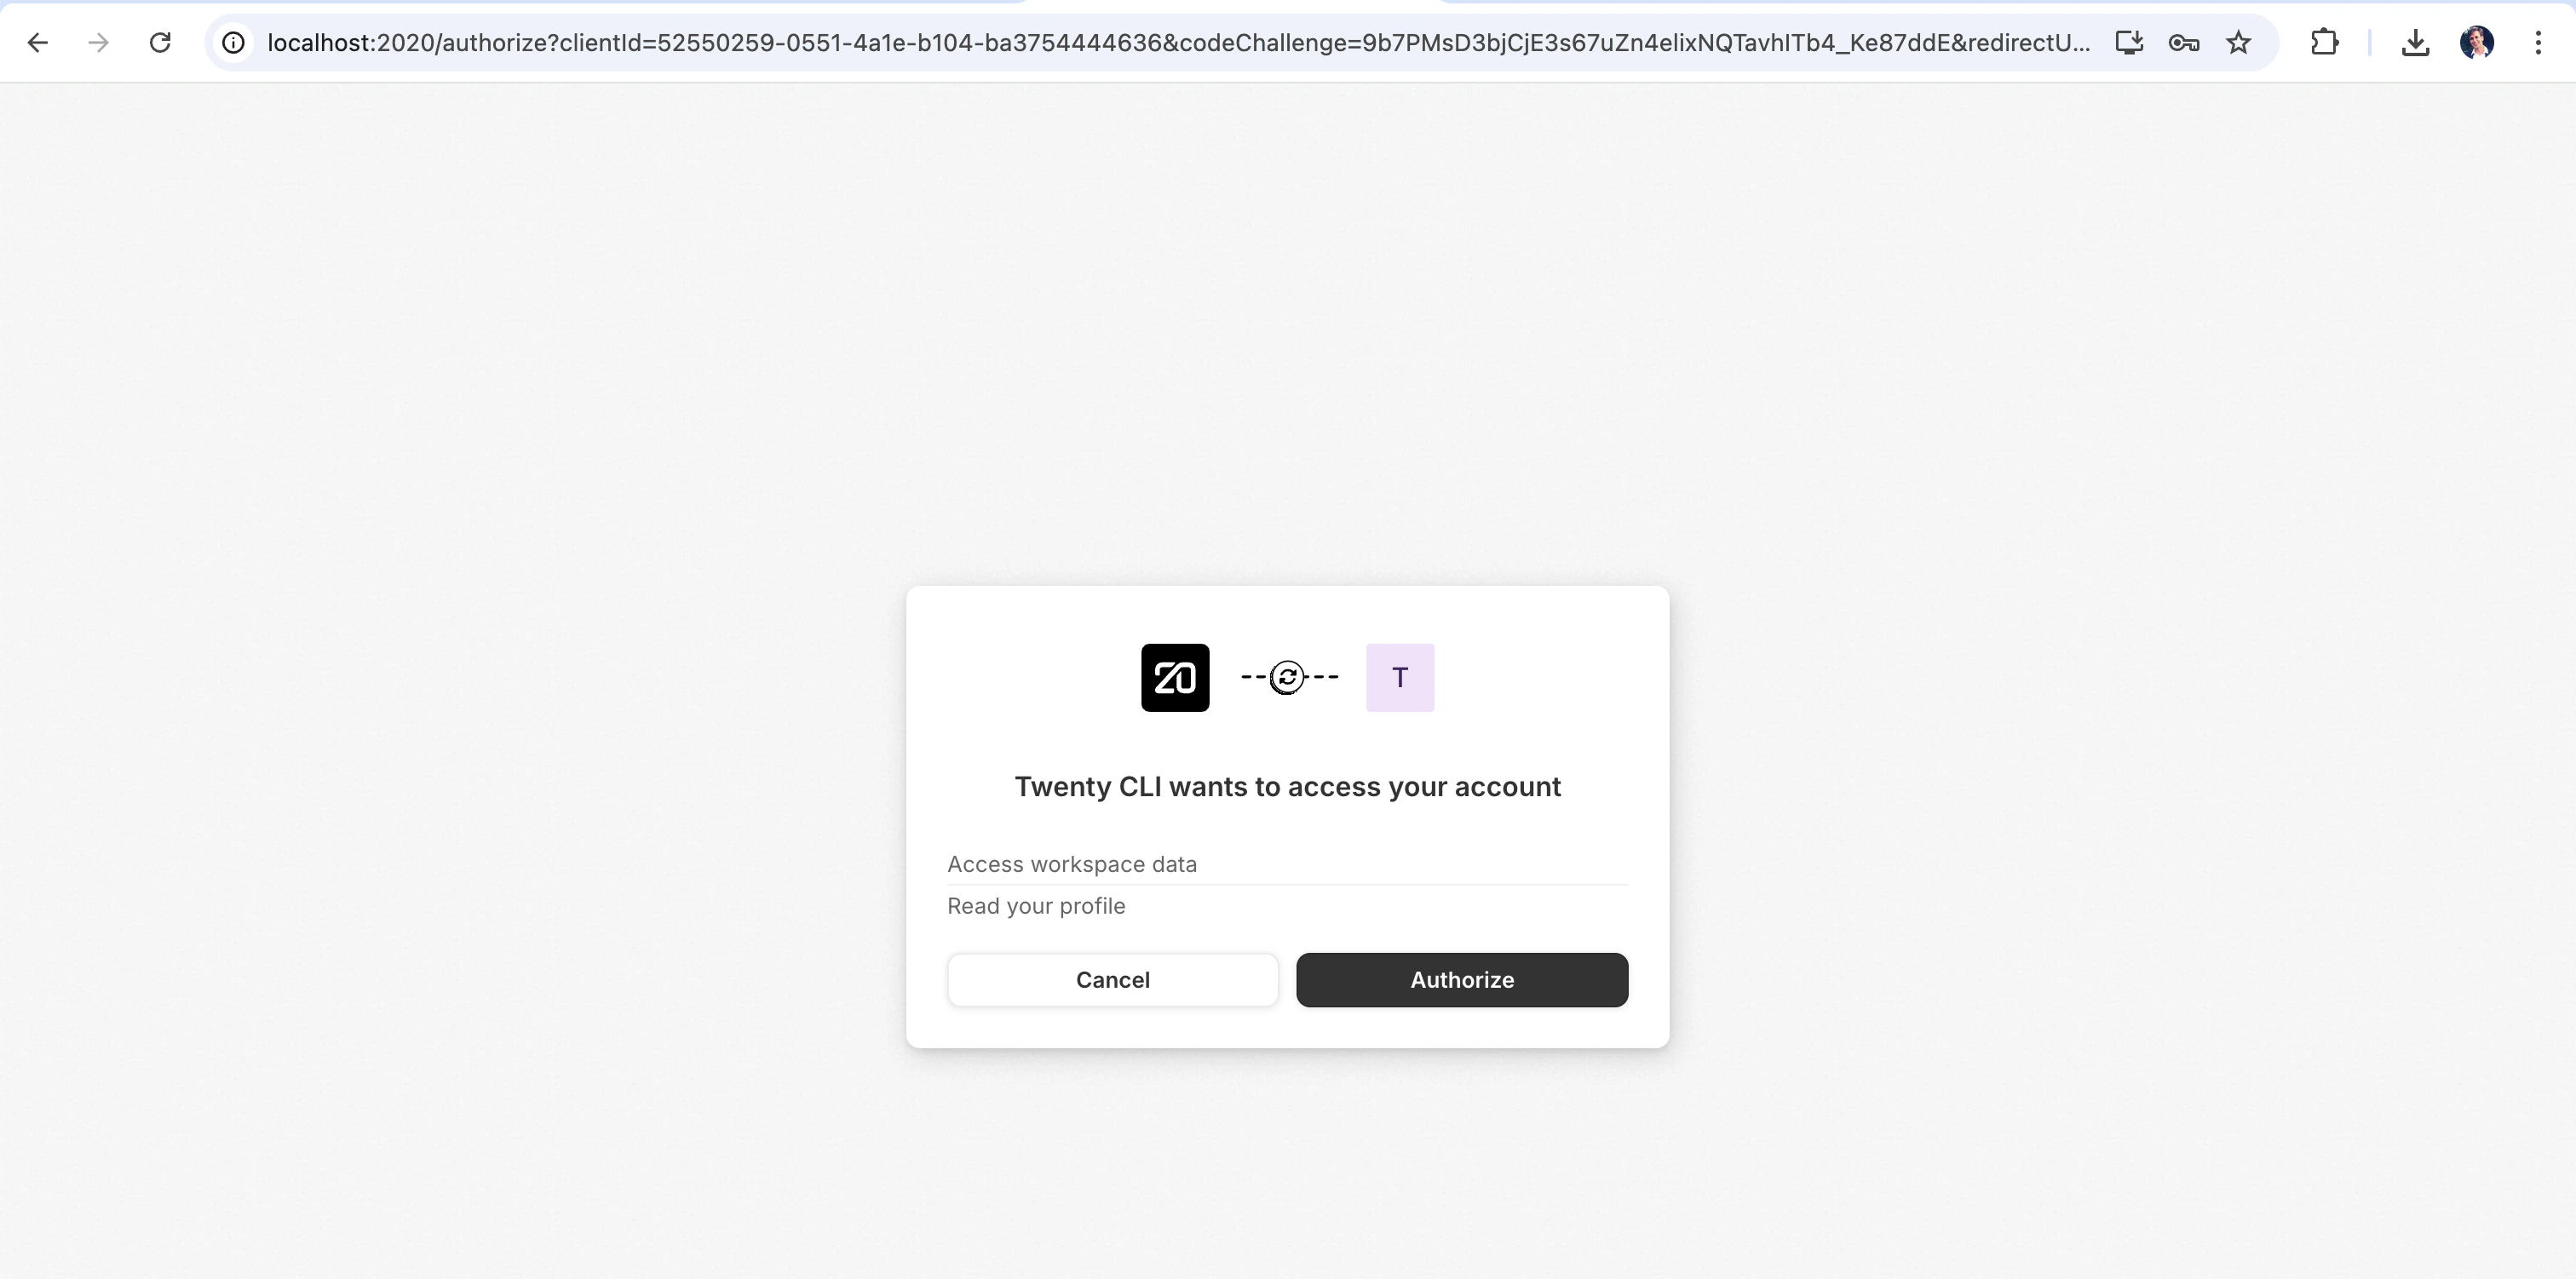
To connect to an existing Twenty server instead, pass --url <your-server-url>. Remote servers authenticate with OAuth: a browser opens so you can sign in and click Authorize, which gives the CLI access to your workspace. (You can also opt into OAuth locally with --authentication-method oauth — sign in with tim@apple.dev / tim@apple.dev.)

If Docker isn’t installed or running, the scaffolder will tell you the right start command for your OS. Once Docker is up, you can resume with
yarn twenty docker:start — no need to re-scaffold.Phase 3 — Sync your changes
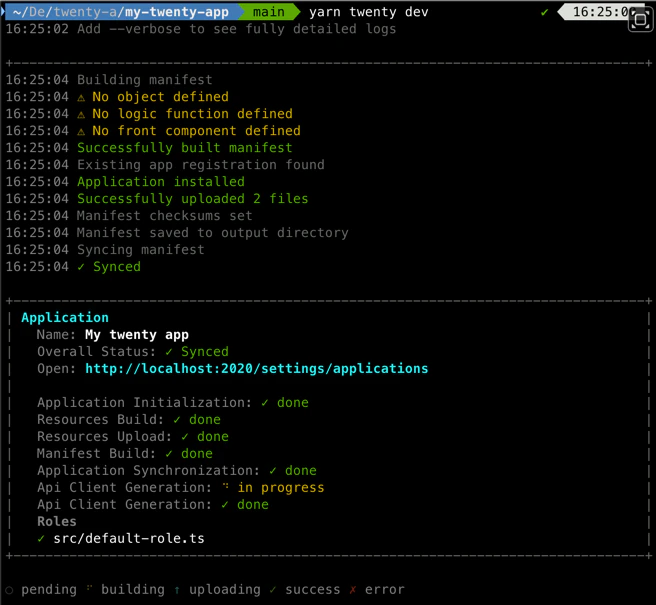
This is the inner loop you’ll spend most of your time in.src/, rebuilds on every change, and syncs the result to the server. Edit a file, save, and within a few seconds the server reflects the change. You’ll see a live status panel in your terminal.
For more detailed output (build logs, sync requests, error traces), add --verbose.
src/ and it appears in the UI.
One-shot sync for CI and scripts
Useplan and apply to run the same pipeline once, without a watcher:
All modes need an authenticated remote. See Syncing & recovery for more on
plan.
yarn twenty dev --once and yarn twenty dev --once --dry-run are deprecated aliases for yarn twenty apply and yarn twenty plan.Dev mode options
What you can build
Apps are composed of entities — each defined as a TypeScript file with a singleexport default:
Full reference: Concepts.
Next steps
Config
Application identity, default role, install and uninstall hooks, public assets.
Data
Objects, fields, and bidirectional relations.
Logic
Logic functions, skills, agents, and OAuth connections.
Layout
Views, navigation, page layouts, front components.
Operations
CLI, testing, remotes, CI, and publishing your app.